

9 Ways to Imprint your Pottery for Texture and Design
Adding texture and designs to your pottery is a fabulous way to create unique, personalized clay pieces. Whether you prefer patterns, symbols, words, or textures, stamping and imprinting offers so many creative possibilities to make your pottery stand out!
Here are 9 ways to incorporate stamping and imprinting into your pottery-making practice — 4 ways to create custom imprinting designs, and 5 ways to use pre-made designs to create original pieces.
4 Ways to Imprint Custom Designs into Clay
The following methods allow you to imprint your clay using original designs for a truly one-of-a-kind artistic touch.
Bisque-Fired Stamps

One of the ways to add unique custom artist-made designs to your pottery is by making your own bisque-fired stamps. You can sculpt stamps out of clay, bisque fire them, and then use them to imprint designs into your clay.
Since bisque-fired clay remains porous, it won’t stick to damp clay, making it an excellent tool for creating your own patterns. Bisque-fired stamps are especially friendly to kids!
→ Tip: Add a handle to your stamps! Whether you are making something small or large, it helps to have a handle you can hold on to when you apply pressure onto the clay.


3D Printed Stamps

If you have access to a basic 3D printer (some public libraries have some you use!), you can design, create, and print custom stamps with your own designs. These can range from logos to original imagery. Personally, I love using 3D printed stamps for content with text, such as business logos, town mottos, and favorite quotes.
Personally, I design my stamps on my ipad using Sketchbook Pro so that they are fully my own work, and then I send them to my brother to 3D model and print for me because he has those skills. If you’re like me, and you don’t know how to 3D model a 2D design and you don’t have a 3D printer at home, you can have your designs printed by someone you know who has those skills, at a USPS store, or you can find someone on Fiver.com or Etsy.com who can do it for you.
→ Tip: When stamping with plastic 3D-printed tools, because plastic is non-porous, be sure to lightly coat your clay with cornstarch to prevent sticking and ensure a clean imprint.


Found Objects for Texture

Let your surroundings be your inspiration! Everyday objects with interesting textures can create stunning imprints on clay. One of my favorite things to do come summertime is forage for potential textures outside. Here are some ideas!
Natural elements like leaves (hydrangeas are my personal favorite), flowers, tree bark, an ear of corn, seashells, rocks, etc.
Fabric & lace such as doilies, netting, or burlap.
Household items like art stencils, scrapbooking stamps, bottle caps, coffee beans, alphabet pasta, Lego bricks, etc. SO many options!
→ Tip: Before imprinting, evaluate your material’s porosity. If the material is non-porous, brush the surface lightly with cornstarch first for a clean imprint that won’t stick. Personally, I use corn-starch for all imprinting just in case!
Linocuts & Hand-Carved Stamps

For another custom look, you can carve your own stamps with a basic lino cutter tool out of linoleum, wood, or rubber carving blocks. If you enjoy block printing, you’ll love using linocuts in clay!
→ Tip: Use easy to cut more flexible linoleum over the harder materials to be able to more evenly press your design into the clay.


5 Ways to Imprint Pre-Made Designs into your Clay
The following methods allow you to imprint your clay using pre-made designs, but you can use them in creative ways to make each piece genuinely original.
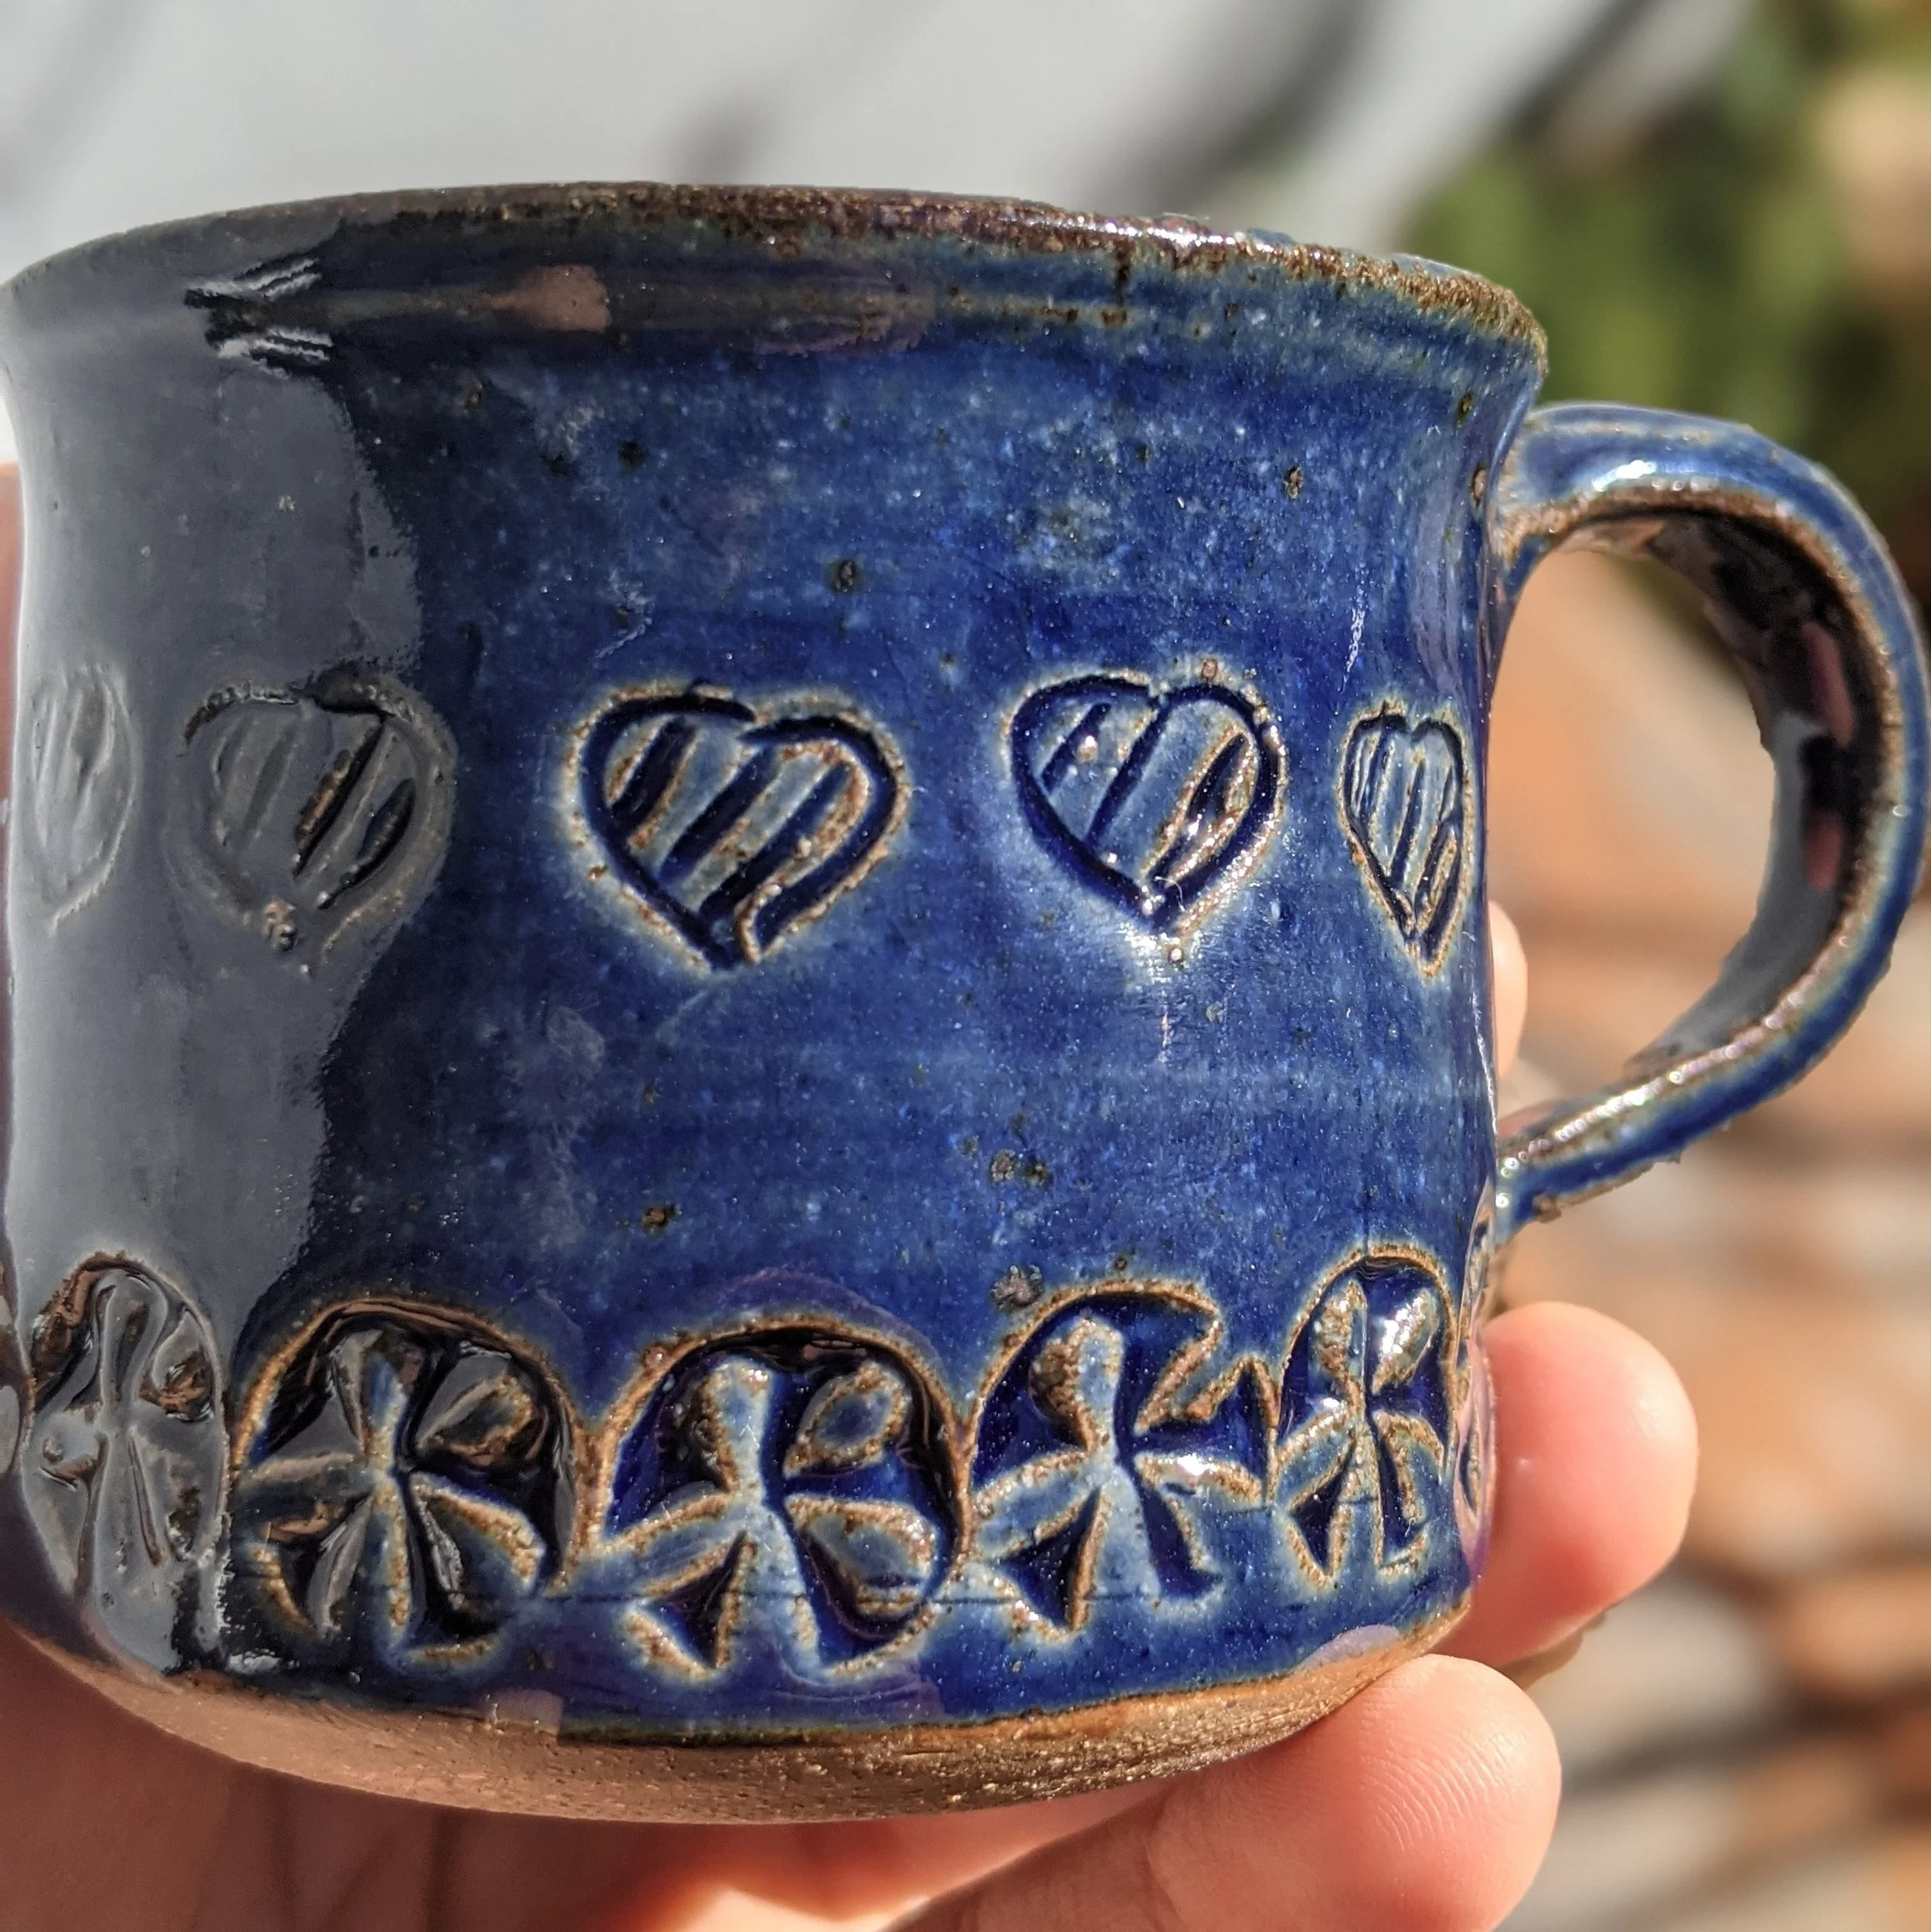
Textured Wooden Embossing Rolling Pins

Ideal for slab building, rolling pins or wooden hand rollers with embossed designs make it easy to cover large areas with beautiful textures with just a simple roll.
In my opinion, some of the best options come from MKM Pottery Tools, available on Amazon and at Blick.com, featuring many designs for diverse aesthetics. The mug above was made with an MKM Pottery Tools hand roller.
Vermont Pottery Works also makes beautiful textured rolling pins and textured planks especially made for mug-making.
You can also find affordable alternatives on Amazon, including rolling pins designed for baking that work just as well on clay. This poppy one is the one I used on the butter dish featured below. Another fan favorite of the studio is this kitty cat rolling pin.
→ Tip: For a consistent imprint, make sure that you apply steady, even pressure while you roll your rolling pin.


Alphabet Stamps

Looking to add custom words and messages to your pieces? There is a wide variety of alphabet stamps out there.
These plastic ones from Amazon come in a 96-piece roman alphabet and are easy to use because they click into each other, ensuring that the letters of each word are level and evenly spaced.
If you want to stamp one letter at a time (and get a set of cute tiny symbols and numbers with it!), this 70 piece metal tool marketed for leather stamping is my personal favorite. I like the handle, which allows me to press more firmly.
→ Tip: Mass producing phrases on a lot of pieces for a larger project? Using alphabet stamps can take a long time. You will save time by 3D printing your own custom stamps for such a project.
Silicone Impression Mats

I first learned about silicone impression mats (like this woodgrain one or this floral and swirls one) in high school after my mentor, Ron Burke, retired.
Initially, I disliked them for mass-producing marks, but I soon saw their creative potential. Using them, I crafted a bottle and cup set that won a Gold Key Scholastic Art & Writing Award—an honor that fueled my pottery journey!
What’s nice about silicone mats (which are most often used for fondant cake decorating) is that they do well on curved surfaces, and it’s easier to press them down evenly to ensure a more consistent imprint.
You can find them online, in arts & crafts supply stores, and even sometimes at the dollar store (which is a great budget place for pottery decorating supplies).
→ Tip: Looking for silicone impression mats? Here are key words you can search for: fondant texture mat, fondant impression mat, polymer clay texture sheet, and impression lace mold.
Arts & Craft Stencils for Texture

While arts & crafts stencils (like this set of 66 natural designs or this set of wildflower mats or this set of 56 mandalas - see featured image) work well for underglaze or slip painting designs onto clay, when working with slabs, you can also use stencils to imprint subtle designs.
Unlike silicone impression mats that tend to press in the design, art stencils will press in the background and make the design pop out.
You can also make your own stencils using a Cricut! I discuss using a Cricut to make vinyl stencils for underglaze, slip, and glaze decorating here.
→ Tip: Since art stencils are most often made of plastic, cover the surface of your slab with a light dusting of corn starch. Place the stencil onto the clay slab and press it into the clay by rolling a rolling pin over it, applying consistent pressure as you roll away from your body.
Wooden Stamps
Another excellent option for stamping is high-quality wooden stamps.
MKM Pottery Tools offers a stunning collection of durable wooden stamps, available in various sizes and designs. Whether you’re looking for a flower, peace sign, dog paw, ginkgo leaf, frog, spiral, skull, fern, dinnerware safe stamp, and many many more, there’s something for every artistic vision.
Collecting different stamps allows you to mix and match designs to create your own unique patterns!
→ Tip: Store your stamps someplace dry. I keep mine organized by type in basic pencil cases.
Final Thoughts!
Stamping and imprinting can open up a world of possibilities for pottery makers.
Whether you create your own bisque-fired stamps, use found objects, or invest in high-quality wooden stamps, adding texture to clay gives your piece a little something extra!
Experiment with different techniques to find the perfect style that suits your artistic vision!
As an Amazon Associate and a Blick Art Materials Affiliate, I earn from qualifying purchases. Your purchases help me with creating my own art, and I am super grateful! Image credits: all images are of my own artwork, please credit Meesh Pottery.